Difference between revisions of "Getting started"
Jump to navigation
Jump to search
(removed empty headlines) |
|||
| (3 intermediate revisions by 3 users not shown) | |||
| Line 1: | Line 1: | ||
__FORCETOC__ | __FORCETOC__ | ||
| − | This page is currently available in | + | This page is currently available in four languages: |
| + | :[[Image:Australia.png]] [[Image:USA.png]] [[Getting started]] | ||
| + | :[[Image:France.png]] [[Getting started-FR]] | ||
:[[Image:China.png]] [[Getting started-ZH]] | :[[Image:China.png]] [[Getting started-ZH]] | ||
| + | :[[Image:Germany.png]][[Getting started-DE]] | ||
= Enabling Developer Mode = | = Enabling Developer Mode = | ||
| Line 40: | Line 43: | ||
[[Image:Enable_developer_mode_step2.png]] | [[Image:Enable_developer_mode_step2.png]] | ||
}} | }} | ||
| − | |||
| − | |||
| − | |||
| − | |||
Latest revision as of 01:19, 10 November 2014
This page is currently available in four languages:
Enabling Developer Mode
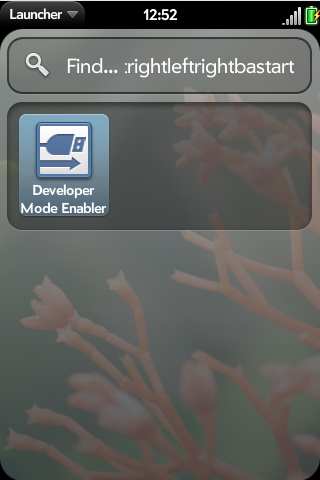
- Go to the main (start) screen on your Palm Pre or Pixi
- Start typing "webos20090606" without the quotation marks.
- Tap the Developer Mode icon and turn Developer Mode on.
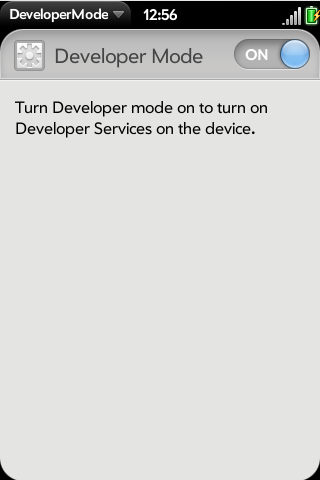
- Set Developer Mode to ON.
- When asked, tap Reset The Device. Your phone will restart.
- Connect the USB cable to your computer and select "Just Charge" when the phone prompts you.
Step 1Type what's below in universal search to find the Developer Mode Enabler app. Run it. This is the classic Konami Code <source lang="text"> upupdowndownleftrightleftrightbastart </source> Since webOS 1.1 a shorter version also works: <source lang="text"> webos20090606 </source> |
Step 2Set the Developer Mode toggle switch to the on position. |

