Difference between revisions of "Application:Precorder"
Rboatright (talk | contribs) (disu) |
Rboatright (talk | contribs) (format) |
||
| Line 66: | Line 66: | ||
When precorder is first launched you will see the main screen. Only one button is currently functional. Tapping the 'Record Now' button will begin recording video to the /media/internal location on the pre making these videos available to be copied via USB. They will be located in the root of the USB drive when connected to your computer. | When precorder is first launched you will see the main screen. Only one button is currently functional. Tapping the 'Record Now' button will begin recording video to the /media/internal location on the pre making these videos available to be copied via USB. They will be located in the root of the USB drive when connected to your computer. | ||
| − | + | === Viewfinder === | |
| − | Note that you are not able to see the video as it is recording. There is no viewfinder. It is currently technically infeasible to create a viewfinder (but maybe someone will work out how to do it). (For a description of why it is technically infeasible, and to make suggestions, ask questions, please see this section in the discussion page.) | + | Note that you are not able to see the video as it is recording. There is no viewfinder. It is currently technically infeasible to create a viewfinder (but maybe someone will work out how to do it). (For a description of why it is technically infeasible, and to make suggestions, ask questions, please see [http://www.webos-internals.org/wiki/Application_talk:Precorder#Viewfinder_discussion this section in the discussion page].) |
| − | + | === Controls === | |
When you tap the 'Record Now' button the screen will change to notify you that Precorder is currently capturing audio and video. There is a 'Stop recording' button located on the screen. Tapping this button stops the audio/video capture and returns you to the main view. | When you tap the 'Record Now' button the screen will change to notify you that Precorder is currently capturing audio and video. There is a 'Stop recording' button located on the screen. Tapping this button stops the audio/video capture and returns you to the main view. | ||
| − | + | === Customization === | |
There are several features of Precorder that can be customized. All of these settings are available via the preferences option within the Precorder menu. The table below lists all possible preferences. Options in bold represent defaults. | There are several features of Precorder that can be customized. All of these settings are available via the preferences option within the Precorder menu. The table below lists all possible preferences. Options in bold represent defaults. | ||
Revision as of 16:17, 28 November 2009
Precorder - Version: Alpha 0.2.3
(25 Nov 2009)
Summary
Precorder has been developed to bridge the gap between the current revision of WebOS and a future release that will enable video recording. It is capable of recording in multiple combinations of audio and video and includes support for using the built-in LED for lumination while recording in dark areas. Video recorded with Precorder is viewable through Palms built in video application.
Status
Precorder is ALPHA SOFTWARE developed primarily by ZSoc of WebOS Internals with assistance from a number of other developers (as listed in the Maintainers field in the package metadata).
It does not have a viewfinder, cause we technically do not know how to do that (yet?).
Recent Changes
Even though Precorder in alpha state is not available for download in Preware (it will be when it goes into beta), once you install Precorder it appears in the Installed Packages section and you can see the package changelogs there.
Donations
Please see the official PreCentral thread first post at http://forums.precentral.net/2059462-post1.html for the donation link. Since this is a wiki that anyone can edit, we do not put the donation link here.
Installation
Note that you cannot install the packages using any other method than the methods below. Specifically, fileCoaster is not able to install these packages.
Preware
Precorder will be added to Preware once it reaches beta status. Until then, please use the Precorder bootstrap script.
Bootstrap Script
The easiest (and guaranteed to always be up to date) method of installing the latest packages via the precorder bootstrap script.
Just run the following two commands on your Pre. You can get a command line either via the Terminal application in Preware, or by an SSH connection, or by using the Linux commandline window in WebOS Quick Install. The precorder bootstrap can also be re-run at any time to safely update Precorder to the latest alpha testing version.
wget http://bit.ly/precorder-bootstrap
sh precorder-bootstrap
WebOS Quick Install
If you can't use the precorder bootstrap script for some reason, you can also use the following links to download the individual packages and install them with WebOS Quick Install. Note that these links will quickly get out of date, so please use the precorder bootstrap to always get the latest alpha testing version.
Note that to be able to use WebOS Quick Install to install Precorder, you must first have installed Preware on your device. See http://install.preware.org for instructions on how to do that. When Precorder reaches beta status, you will be able to install, update and remove the packages directly in Preware.
You can install the GstService and Precorder ipkg files with WebOS Quick Install. (Note that these links may be out of date if we forget to update them every time we release a new version)
- Save the gstservice and and Precorder ipk's to your local computer.
- Install WebOS Quick Install
- Drag the gstservice IPK into the center of the WebOS Quick install window.
- Click the Install button.
- Drag the Precorder application ipk into the center of the WebOS Quick Install window.
- Click the install button.
License
The GStreamer Service package is MIT Open Source licensed. The Precorder application is GPLv2 Open Source licensed.
Operating notes
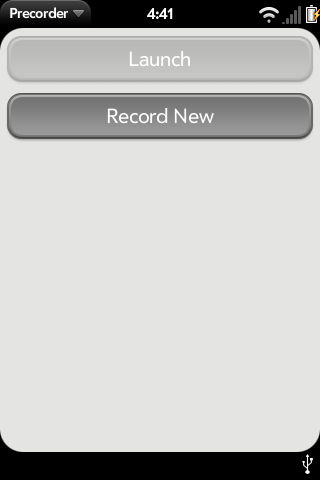
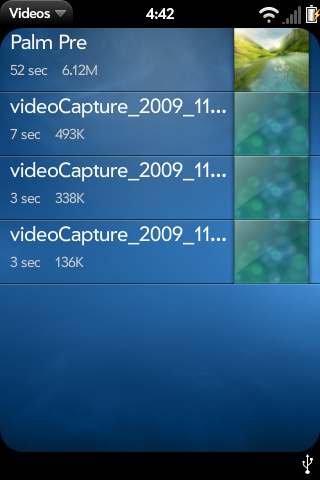
When precorder is first launched you will see the main screen. Only one button is currently functional. Tapping the 'Record Now' button will begin recording video to the /media/internal location on the pre making these videos available to be copied via USB. They will be located in the root of the USB drive when connected to your computer.
Viewfinder
Note that you are not able to see the video as it is recording. There is no viewfinder. It is currently technically infeasible to create a viewfinder (but maybe someone will work out how to do it). (For a description of why it is technically infeasible, and to make suggestions, ask questions, please see this section in the discussion page.)
Controls
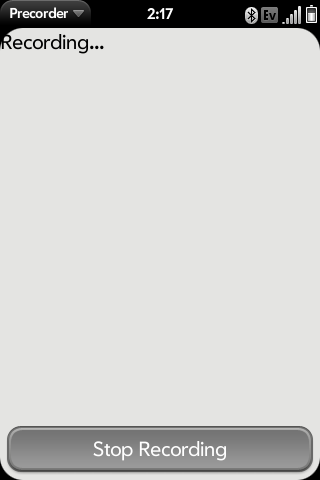
When you tap the 'Record Now' button the screen will change to notify you that Precorder is currently capturing audio and video. There is a 'Stop recording' button located on the screen. Tapping this button stops the audio/video capture and returns you to the main view.
Customization
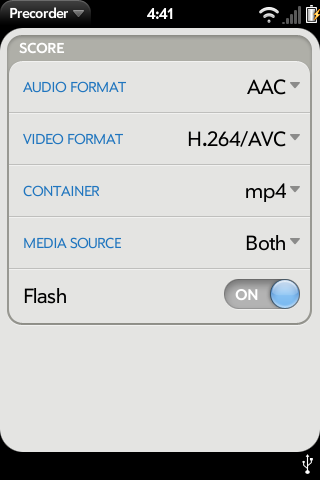
There are several features of Precorder that can be customized. All of these settings are available via the preferences option within the Precorder menu. The table below lists all possible preferences. Options in bold represent defaults.
|
Recent enhancements
Precorder has just been released for Alpha testing.
Known bugs
Precorder is currently in Alpha stages and as such is in a constant state of flux with new features being added and old functionality being modified. Please use this software at your own risk. Due to the alpha nature of the software, please check the discussion page for a more accurate list of bugs and/or feature requests.
- First run on any phone will cause a blank output.
- Simply start recording, wait a moment, and stop recording, wait a moment. After that, it should be fine.
- Getting the video light to work may cause 2 starts. Should be a 1-time-only process.
Source Code
Source at git.webos-internals.org
Packages in the webos-internals testing feed


