Difference between revisions of "Getting started-ZH"
Jump to navigation
Jump to search
(Created page with '__FORCETOC__ = 开启开发者模式 = # Go to the main (start) screen on your Palm Pre or Pixi # Start typing "webos20090606" without the quotation marks. # Tap the Developer…') |
|||
| Line 3: | Line 3: | ||
= 开启开发者模式 = | = 开启开发者模式 = | ||
| − | # | + | # 进入Palm Pre or Pixi的主界面(开机界面) |
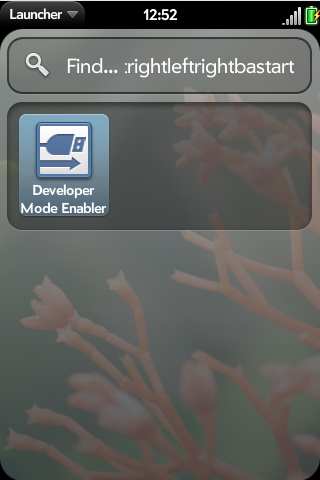
| − | # | + | # 键入"webos20090606",不要有标点符号。 |
| − | # | + | # 点击开发者模式图标,即打开开发者模式。 |
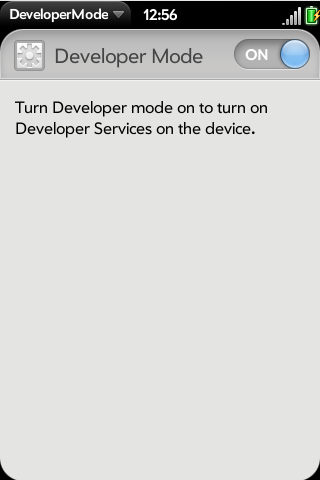
| − | # | + | # 并将开发者模式置于开。 |
| − | # | + | # 当界面询问时,点击重启设备,手机将会重启。 |
| − | # | + | # 将USB线连接至你的电脑上,出现选择提示时请选择“Just Charge”. |
Revision as of 15:44, 28 December 2010
开启开发者模式
- 进入Palm Pre or Pixi的主界面(开机界面)
- 键入"webos20090606",不要有标点符号。
- 点击开发者模式图标,即打开开发者模式。
- 并将开发者模式置于开。
- 当界面询问时,点击重启设备,手机将会重启。
- 将USB线连接至你的电脑上,出现选择提示时请选择“Just Charge”.
Step 1Type what's below in universal search to find the Developer Mode Enabler app. Run it. This is the classic Konami Code <source lang="text"> upupdowndownleftrightleftrightbastart </source> Since webOS 1.1 a shorter version also works: <source lang="text"> webos20090606 </source> |
Step 2Set the Developer Mode toggle switch to the on position. |

